|
|
|
|
|
|
|
Tires have often been a weak spot in many model kits. The kit manufacturers seem to be able to tool up an all new kit with great overall detail and then saddle the kit with one of their one size fits all tires. They will use the same tires in a wide range of kits, whether those tires are correct for the subject or not. Let's take a look at what is needed to get these new soft resin tires ready for installation.
|
|
|
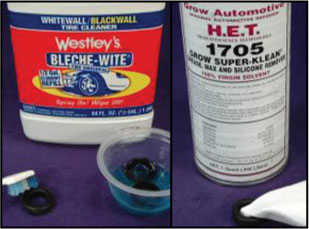
The first step is to soak the tires in some Westley's Whitewall tire cleaner for a few hours. Scrub them with an old toothbrush under some warm water after removing them from the bleach. As a final precaution I wiped the tires down with wax and grease remover. This type of product is available at paint stores that supply autobody/paint shops.
|
|
|
The next step is to address any small amount of flash around the mold seam. As these tires are quite soft I found that sanding or trying to cut flash off was difficult. I found that it helped to simply freeze them prior to sanding the seam area. This firmed up the resin just enough to make it respond to the 150 grit sandpaper.
|
|
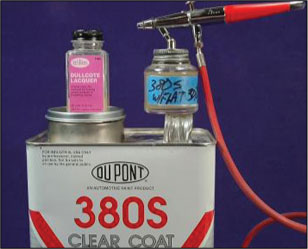
Our tires are now ready for some sidewall detail. As the lettering is done with waterslide decals I have found these stick better to a surface that has been prepped with a thin coat of clear lacquer.
For this I use a mix of clear lacquer, in this case Dupont 380S (what ever brand you prefer will work equally as well), Testor's Dullcoat Lacquer (#1160), and a quick dry lacquer thinner (such as Dupont 3608S). I ended up with a ratio of 2:1 thinner to clear and then added the Dullcoat to preference. Just depends on how much sheen you want on your tire sidewalls.
|
|
|
|
This same mix was sprayed on after the decal application to seal them to the tire. This also has the effect of making the clear decal carrier disappear.
|
|
The decals were cut as close to the lettering as possible and simply applied to the tire. I did place a wheel into the tire as this makes it easier to visually place the decals in the proper location. The tire was wetted down prior to sliding on the decals, this allowed plenty of time to move the decal with a toothpick.
Once in place, the decal was patted and dried using a Q-tip. No setting solution was used or needed. The tire was set aside to dry for approximately 15 minutes, then the clear sealer mix used to prep the sidewall was applied over the decaled sidewall.
|
|
|
|
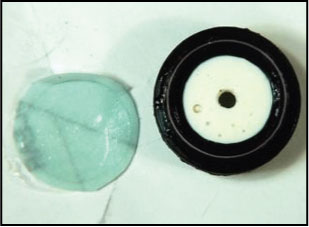
I recommend gluing your wheel into place in the tire as soon as the sealer dries. The tires are soft and over flexing the sidewalls may crack or otherwise harm the decals. The installation of the wheel will give the tire added rigidity.
|
|
The redline decals are a bit trickier proposition to apply. The first step is to lightly score the decal around it's inside edge. You don't want to cut deeply or through the decal paper as this needs to remain smooth for the decals transfer to the tire.
Next cut the outside edge completely through the paper, with the exception of leaving a small 'tab' on one end. This will give you something to hold while applying the decal. Lightly score the decal film between the tabs cut lines so the redline will release cleanly from the clear carrier film.
|
|
|
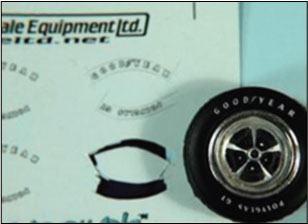
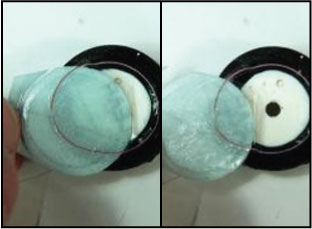
These two photos below show the process of sliding the decal onto the tire. It is a good idea to place a smooth wheel or wheel back into the tire. The decal has less chance of 'falling' into the center of the tire this way. The contrasting color of the wheel also is a visual aid when centering the redline on the tire.
Hold the decal in one hand at the tab, then holding the decal with two fingers, very gently begin to nudge it onto the tire. You'll want the tire sidewall wet during the process.
|
|
|
The decals were easy to center once off the carrier paper. When your satisfied with the placement lightly pat them down with a Q-tip or paper towel.
Like the white letters, I set this tire aside to dry for approximately 15 minutes prior to sealing it.
|
|
|
|
|
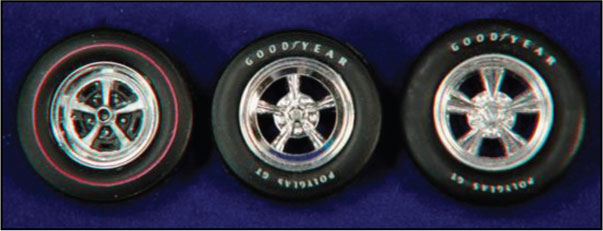
Here are three of the completed tires. The redline on the left and Polyglas in the middle are SELtd #24642: Wide Oval Series A (old 70 SERIES). These fit beautifully on virtually any 1/25 scale model requiring a 14" 70 series tire.
The larger tire on the right is SELtd. #24643: Wide Oval Series B and is a great fit on 1/24 scale models or 1/25 scale models needing a larger 15" tire. It can also be used in conjunction with the smaller tire for a set of big-n-littles.
|
|
|