|
|
|
|
|
|
|
One of our goals as scale modelers is to convince viewers that they are looking at something real. To create this illusion, we first need recognizable objects, which in this case are our range of autotive tires. Now we need to complete the illusion by adding the correct color and texture that will trick viewers into believing that they are indeed looking at the real thing.
|
|
Since the introduction of our range of tires we have received many requests for painting instructions. The short story is that there is not ONE way to convinceingly paint a tire. Mike Hanson presented detailed instructions in his article from the December 2003 issue of Scale Auto. You can access this information online as well at www.scaleautomag.com.
Mike’s excellent technique invloves solvent based paints we prefer a water based approch.
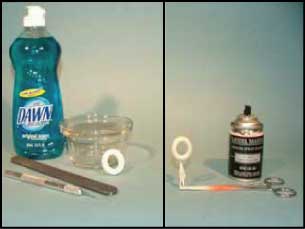
The materials used are as shown.
|

|
|
Due to the very nature of the casting process some sort of flash and mold marks are inevatable. We prefer a sanding stick for removal. At this time check the fit of the wheel you are planing to use and make any necessary adjustments.
Now, to the skink! Wash the parts with detergent and rinse well with running water. Allow to air dry.
A primer coat is now needed. Set up the castings in some sort of holder of your choice. Use your choice of primers. We prefer Testors rattle cans in either a flat white or flat light gray.
|
|
|
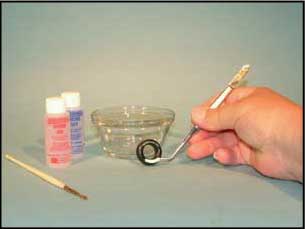
Gunze-Sayngo acrylic paint, “Tire Black”, is used for the color. The tread is painted first, making sure all surfaces are covered. Then the sidewalls using long smooth strokes allowing the paint to level itself out. Brush quality is very important. Don’t skimp as a quality brush will last many years. At least 1/4 inch to 1/2 inch wide for this job.
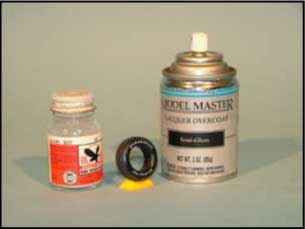
Sealing the acrylic paint is important to provide the desired surface shean as well as a base for any subsequent detailing. We prefer Testors Semi-Gloss.
If you are replicating a blackwall go to step 5.
Or.....................................
|

|
|
This applies to any sidewall detail either a colored trim or RWL. As always cut the decal close to the image, and float it in warm water allowing the backing to loosen. Then, using the MicroScale System, slide the image to the sidewall and position.
After the decals have dried apply another coat of sealer to hide the edges of the decal.
|
|
|
|
Now the trick part. Apply Poly-S “Dust” to only the treads and allow to dry. Just apply one coat and allow to dry to judge the effectiveness of the product. A second or third coat my be needed to bring to a level of your liking.
|
|
|
|